Host Nuxt 3 Application with Firebase Hosting

Learn how to effortlessly deploy a Server Side Rendered Nuxt 3 app on Firebase.
Firebase Hosting, renowned for its fast and secure hosting capabilities, offers an excellent solution for hosting your web application, encompassing static and dynamic content, along with microservices. In the realm of server-side rendering (SSR), Nuxt 3 emerges as a powerful ally, seamlessly integrating with Firebase Hosting and leveraging Cloud Functions.
With Nuxt 3, you can effortlessly deploy your application on Firebase Hosting, taking advantage of its exceptional performance and robust security measures. By utilizing the Nitro preset firebase, Nuxt 3 enables you to generate an app output that seamlessly aligns with Firebase Hosting requirements. This compatibility ensures a hassle-free deployment process, saving valuable time and effort.
The blog is written based on the following versions,
- Nuxt: 3.5.0
- Node: 18
- Firebase CLI: 12.0.0
Firebase hosting for the nuxt app involves multiple steps which are outlined below,
Firebase packages for deployin a nuxt 3 ssr app:
When it comes to hosting a Nuxt 3 SSR (Server-Side Rendered) application on Firebase, there are a few essential packages that you'll need as dev dependencies. These packages are integral to the deployment process and ensure smooth functionality. Let's take a look at each one:
- firebase-admin: This package allows you to interact with Firebase services on the server-side, granting you administrative privileges and enabling seamless integration with Firebase Hosting.
- firebase-functions: With this package, you gain the ability to write and deploy Cloud Functions for Firebase. These functions allow you to extend your application's backend logic and handle various tasks efficiently.
- firebase-functions-test: This package provides a robust testing framework for your Firebase Cloud Functions. It facilitates comprehensive testing, ensuring the reliability and stability of your deployed functions.
- firebase-tools: As the name suggests, this package serves as a set of powerful command-line tools specifically designed for Firebase. It simplifies the deployment process by offering features like deployment management, local testing, and more.
To add these packages to your Nuxt app's package.json file, simply include them as dev dependencies. Then, execute the npm install command to install them effortlessly. Once installed, you'll have the necessary tools at your disposal to host your Nuxt 3 SSR app on Firebase with confidence and ease.
Firebase login and initialisation for the Nuxt project:
In order to successfully host your Nuxt app on Firebase, it's crucial to set up authentication for Firebase first. This authentication process allows the Firebase CLI to create and deploy your application seamlessly. To authenticate, follow these steps using the Firebase CLI:
- Begin by running the command
firebase login. This command will open a Firebase URL, prompting you to log in to your Firebase account. Once you've successfully logged in, Firebase will store the credentials on your machine for future use. - After logging in, ensure that you accept all the terms and conditions presented by your Firebase account. This step cannot be completed through the CLI. Failure to accept the terms and conditions will cause the CLI to fail in subsequent commands.
- Run the command
firebase initto initialize your project. This command will prompt you to choose from various Firebase feature options. Select the feature "Hosting: Configure files for Firebase Hosting and (optionally) set up GitHub Action deploys".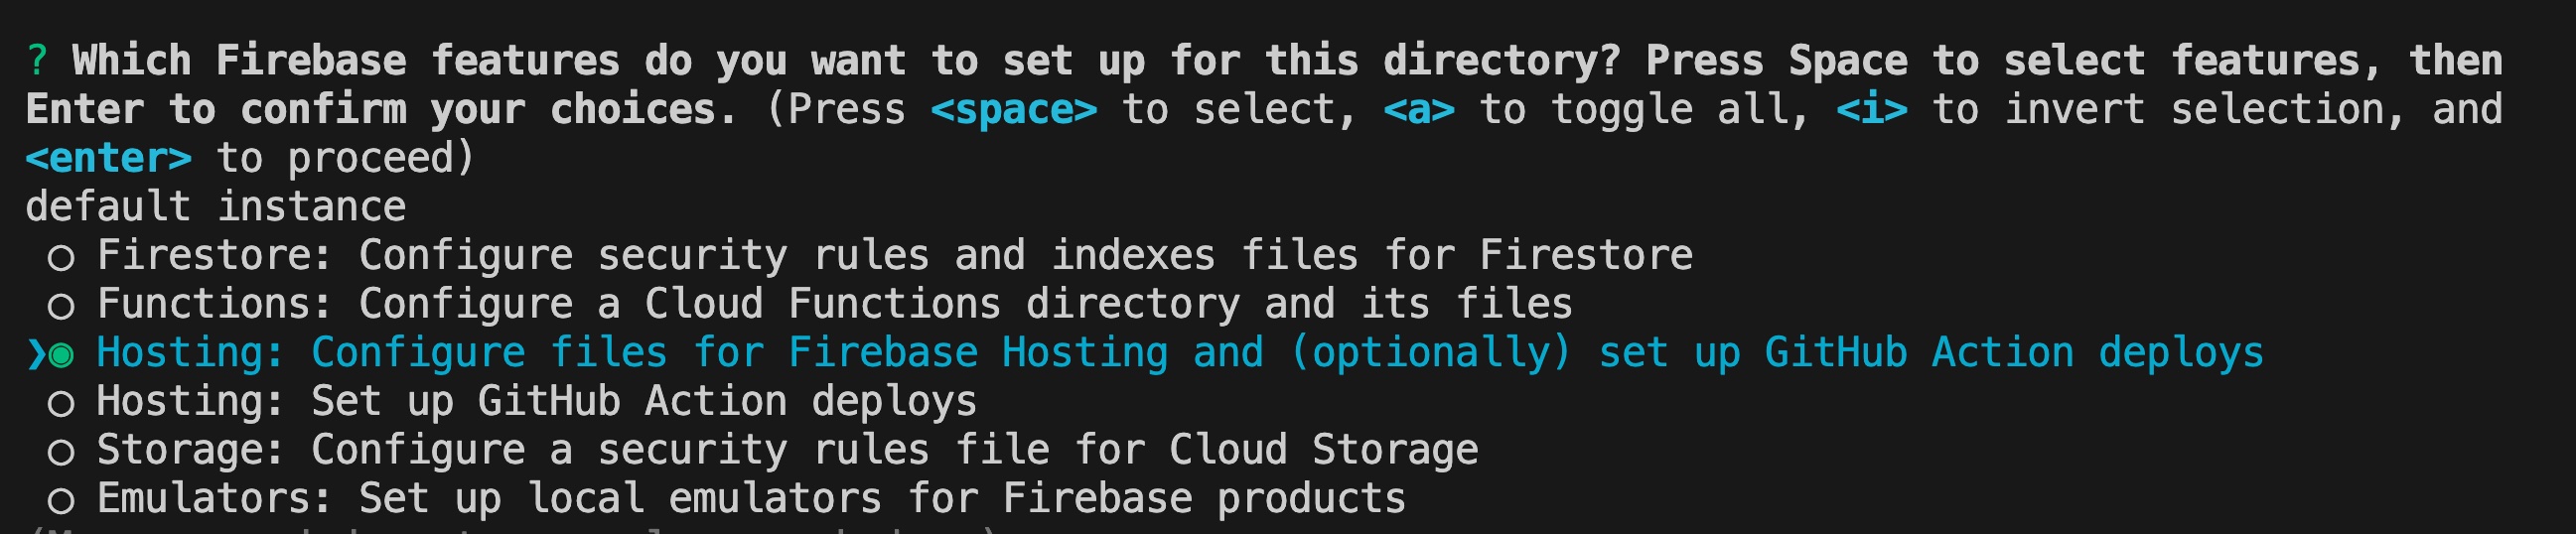
- Once the Hosting feature is initialized, two files,
firebase.jsonand.firebaserc, will be generated. - The
firebase.jsonfile contains the configuration specific to Firebase Hosting, and the deployment process relies on this configuration. To enable SSR for your Nuxt 3 app, you need to modify this file and add the following attributes:
- functions
- site
- cleanUrls
- rewrites After making the necessary changes, your updated firebase.json configuration will look like the following:
{
  "functions": { "source": ".output/server" },
  "hosting": {
    "site": "nuxt3-demo-app",
    "public": ".output/public",
    "cleanUrls": true,
    "rewrites": [{ "source": "**", "function": "server" }],
    "ignore": ["firebase.json", "**/.*", "**/node_modules/**"]
  }
}- The
.firebasercfile contains the project ID associated with your Firebase project. By following these steps, you will have successfully set up the authentication for Firebase and configured the necessary files for hosting your Nuxt app on Firebase Hosting.
Nuxt 3 SSR Build process for firebase hosting
To proceed with the execution of the Nuxt build command, it is essential to configure the nitro preset either within the nuxt.config.ts file or by passing it during the build process. In my preference, I recommend setting this configuration in the nuxt.config.ts file itself. Below is an example of the configuration file:
export default defineNuxtConfig({
    nitro: {
        preset: 'firebase'
    }
})
By incorporating this configuration, you ensure that the nitro preset is correctly established, utilizing the 'firebase' preset in this particular case. Now, it's time to initiate the Nuxt build process by running the nuxt build command. This action triggers the generation of the .output folder, which comprises both the static and server-side rendering output files.
Deploy Nuxt App to Firebase Hosting via CLI
Before proceeding with the deployment of your Nuxt app, it is important to ensure that your Firebase billing plan is set to Blaze, which operates on a pay-as-you-go model. This particular billing plan is required in order to host a Nuxt SSR (Server-Side Rendered) app successfully. By selecting the Blaze billing plan, you gain access to the necessary resources to support the hosting of your application.
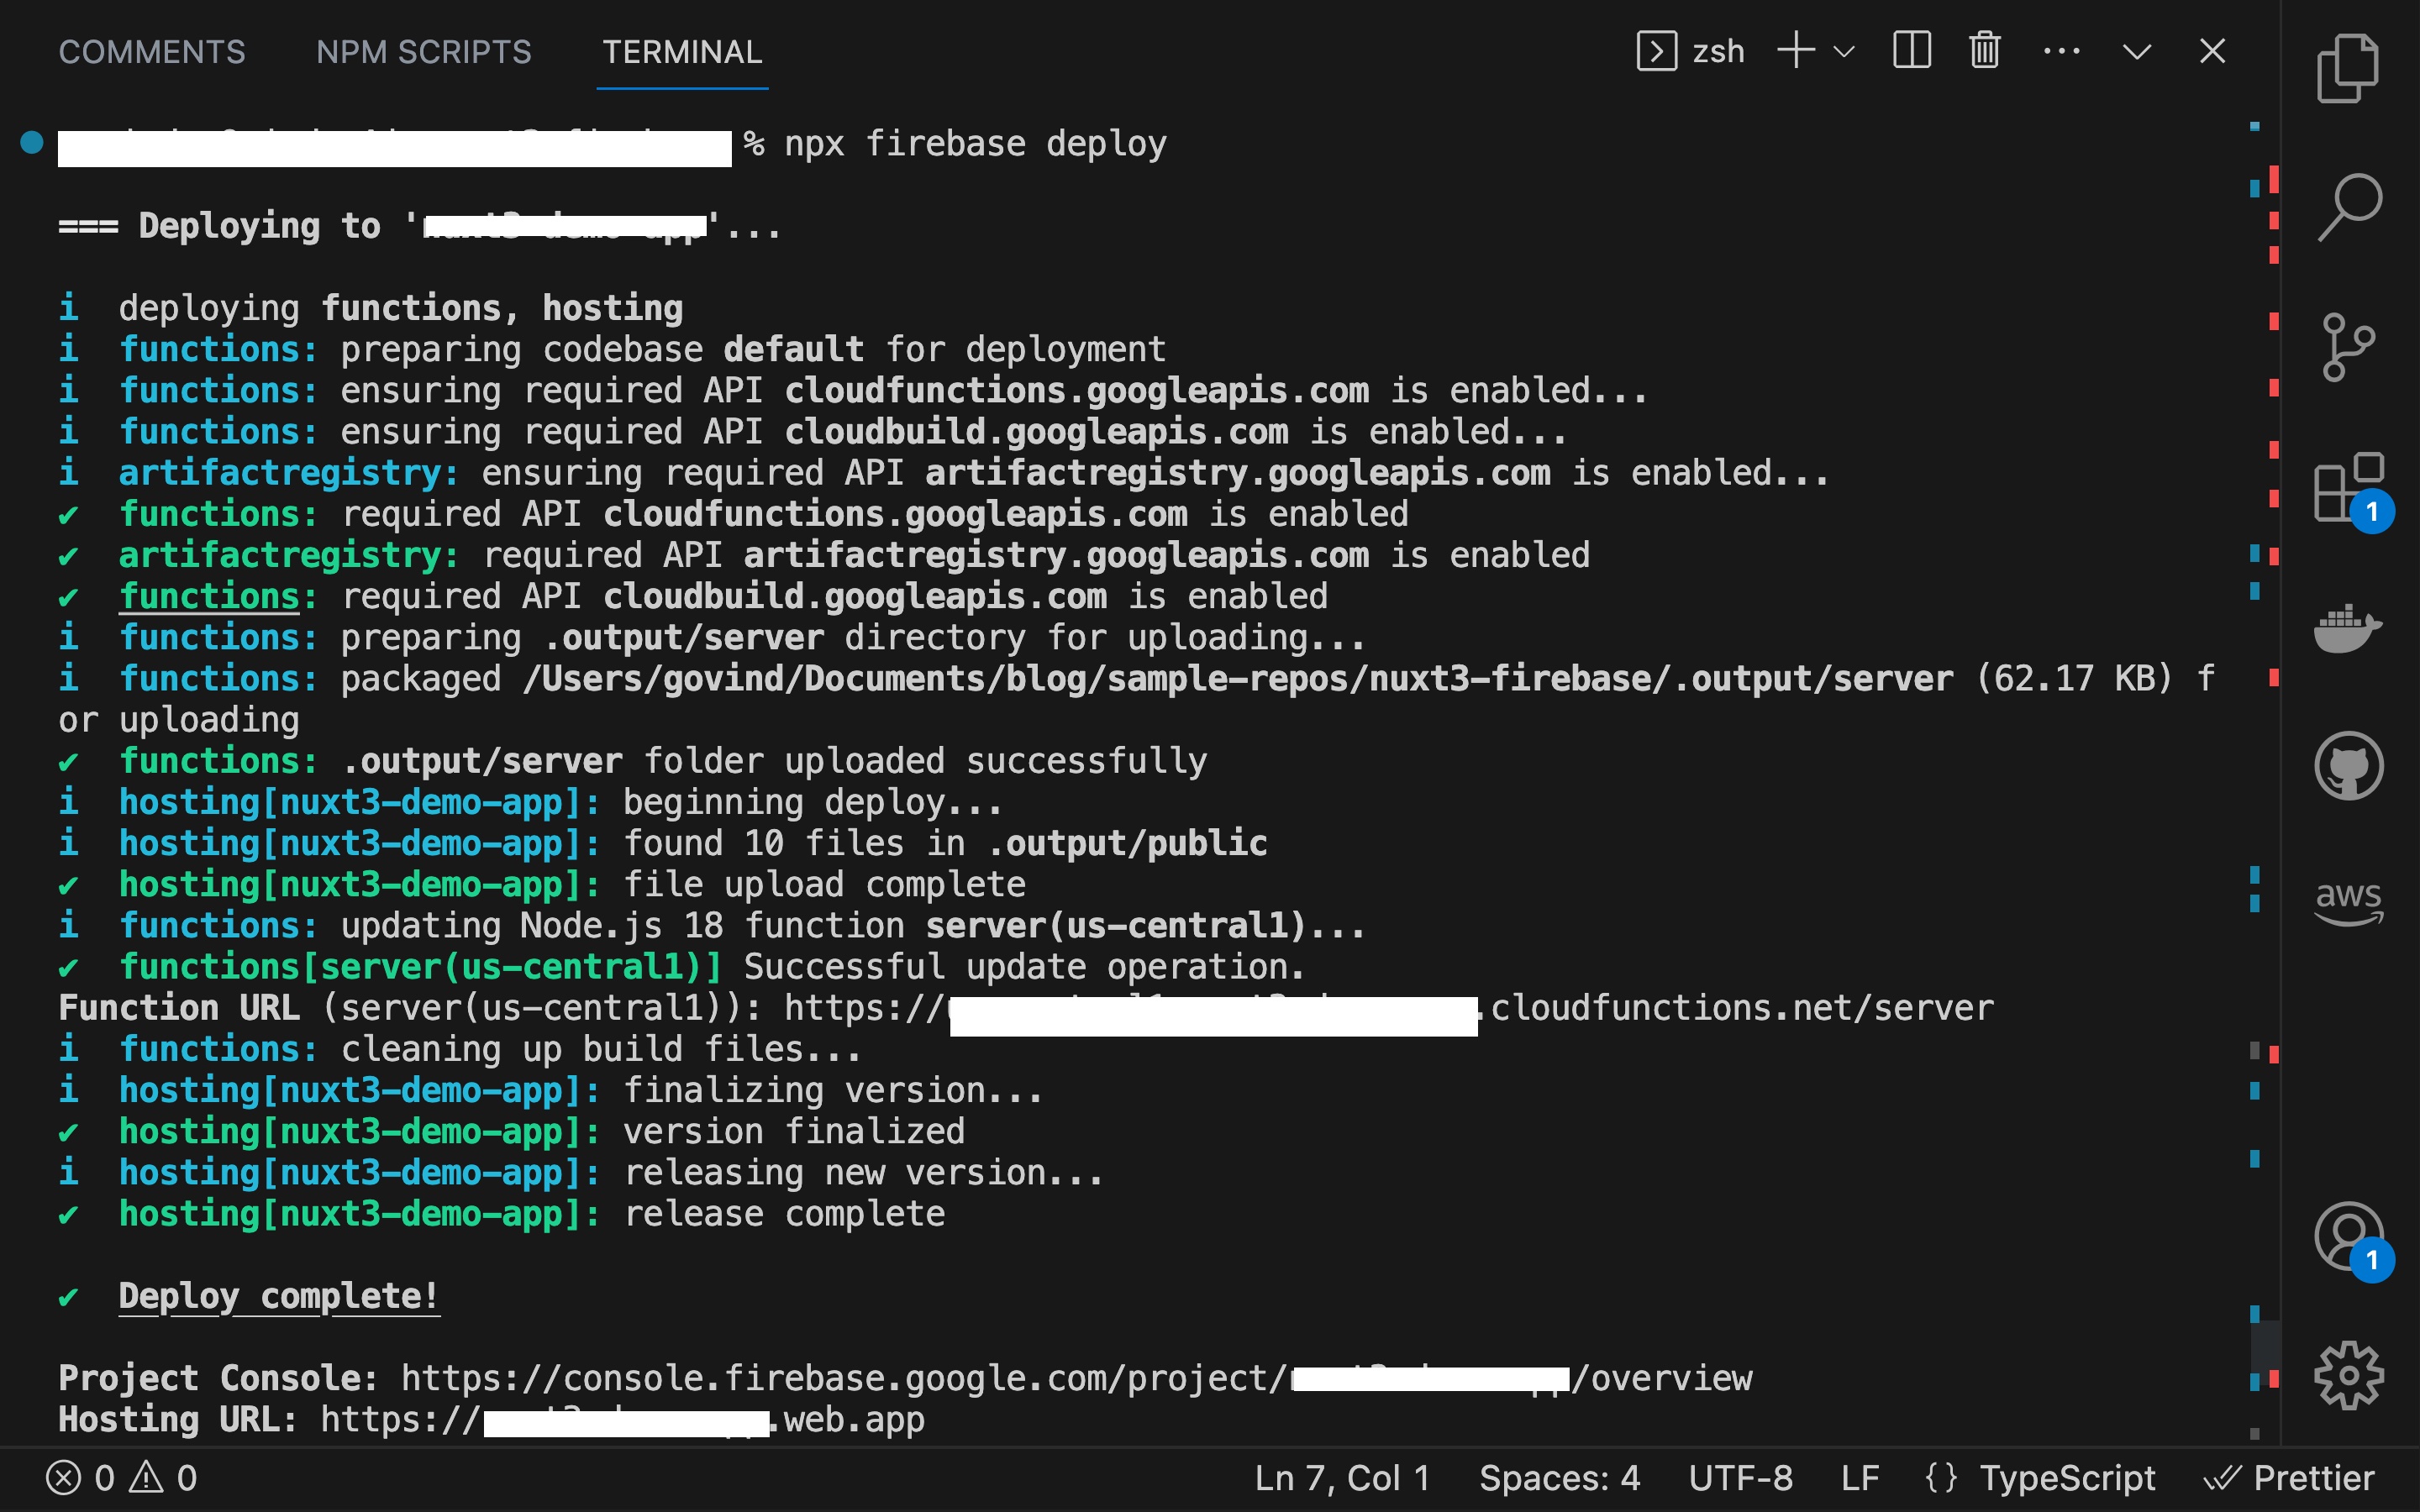
Once you have confirmed that your billing plan is set to Blaze, you can initiate the deployment process by running the command npx firebase deploy. This command triggers the deployment of your application to Firebase. The deployment process typically takes a few minutes to complete.
Upon successful deployment, Firebase will generate both a Function URL and a Hosting URL for your application. The "Function URL" corresponds to the SSR URL for your Nuxt application. This URL is hosted as a Google Cloud Function and is responsible for server-side rendering the pages of your application. It plays a crucial role in delivering dynamic content and optimizing the user experience.
Nuxt 3 Firebase Sample Repo
You can check the sample project for nuxt 3 app hosted on firebase here in this sample repo